
How To Prep Your Water Heater For Cooler Weather
Cooler weather is on the way, and your water heater is about to work harder than it has all year. Central Texas summers keep incoming water warm, but once fall arrives, groundwater temperatures drop and your water heater must burn more energy to hit the same setpoint. That extra strain exposes weak parts, hidden sediment, and worn valves that went unnoticed during the summer months. Prepping your water heater now means fewer surprises when the first cold front rolls through Cedar Park, Leander, or Round Rock. It also means lower energy bills, longer equipment life, and hot showers that never quit. Most of the prep work is simple, but timing matters; the best time to prepare is before the temperature drops, not after. This guide walks you through why fall prep matters and the exact maintenance steps that protect your tank. Follow these steps and your water heater will be ready for anything cooler weather brings.
Why You Should Prep Your Water Heater Before Cooler Weather Hits
Your water heater is the hardest working appliance in your home, and cooler weather multiplies its workload. Incoming water in Texas can drop from the 80s in summer to the 50s in winter, which forces the unit to raise water temperature by 30 or more additional degrees. That means longer burn cycles, more electrical draw, and more stress on every component inside the tank. A water heater that limps along fine in July can fail completely during the first cold snap of the season. Sediment, corrosion, and failing valves all get worse under heavier loads. Prepping your water heater before cooler weather hits gives you time to catch these problems while they are still cheap to fix. Waiting until winter puts you in line behind every other homeowner with an emergency. A little preparation now saves you money, stress, and cold showers later.
How Cooler Weather Affects Your Water Heater Performance
Cooler weather changes the math for your water heater in ways most homeowners never consider. The water entering your home travels through underground supply lines, and those lines get colder as soil temperatures drop through fall and winter. Your water heater must close the gap between that colder incoming water and your thermostat setting, usually 120 degrees. In summer, the unit might only need to raise water temperature by 40 degrees; in winter, that jump can exceed 65 degrees. Every additional degree requires more gas or electricity, which shows up on your utility bill. Recovery time also slows down, so the tank takes longer to reheat after a shower or a load of laundry. Households notice this most on cold mornings when everyone wants hot water at once. Understanding this seasonal shift is the first step in prepping your water heater for cooler weather.
The physical components of your water heater also feel the effects of cooler weather. Metal tanks, fittings, and pipes contract slightly as temperatures fall, which can stress joints and connections that were already loose. Thermal expansion becomes more dramatic because the temperature swing between cold incoming water and heated water grows wider. That expansion raises pressure inside the tank with every heating cycle. A properly functioning expansion tank absorbs this pressure, but a failed one lets stress build against your tank walls and relief valve. Pilot lights and igniters on gas units can also struggle when garages and utility closets get cold and drafty. Electric elements work overtime and burn out faster under the increased demand. Each of these factors makes fall the smartest season for a full checkup.
Performance drops from cooler weather often mimic symptoms of a dying water heater, which confuses many homeowners. Lukewarm water, slow recovery, and higher bills might just mean the unit is fighting colder inputs. However, those same symptoms can signal sediment buildup, a failing heating element, or a broken dip tube. The only way to know the difference is to inspect and test the system before winter demand peaks. A unit that is 8 to 12 years old deserves extra scrutiny because cold weather stress is what pushes aging tanks over the edge. Catching a marginal unit in October is far better than discovering a dead one in January. Prep work gives you a clear picture of your water heater’s true health. That knowledge lets you repair or replace on your schedule instead of during a crisis.
Prep Your Water Heater to Prevent Cold Weather Breakdowns
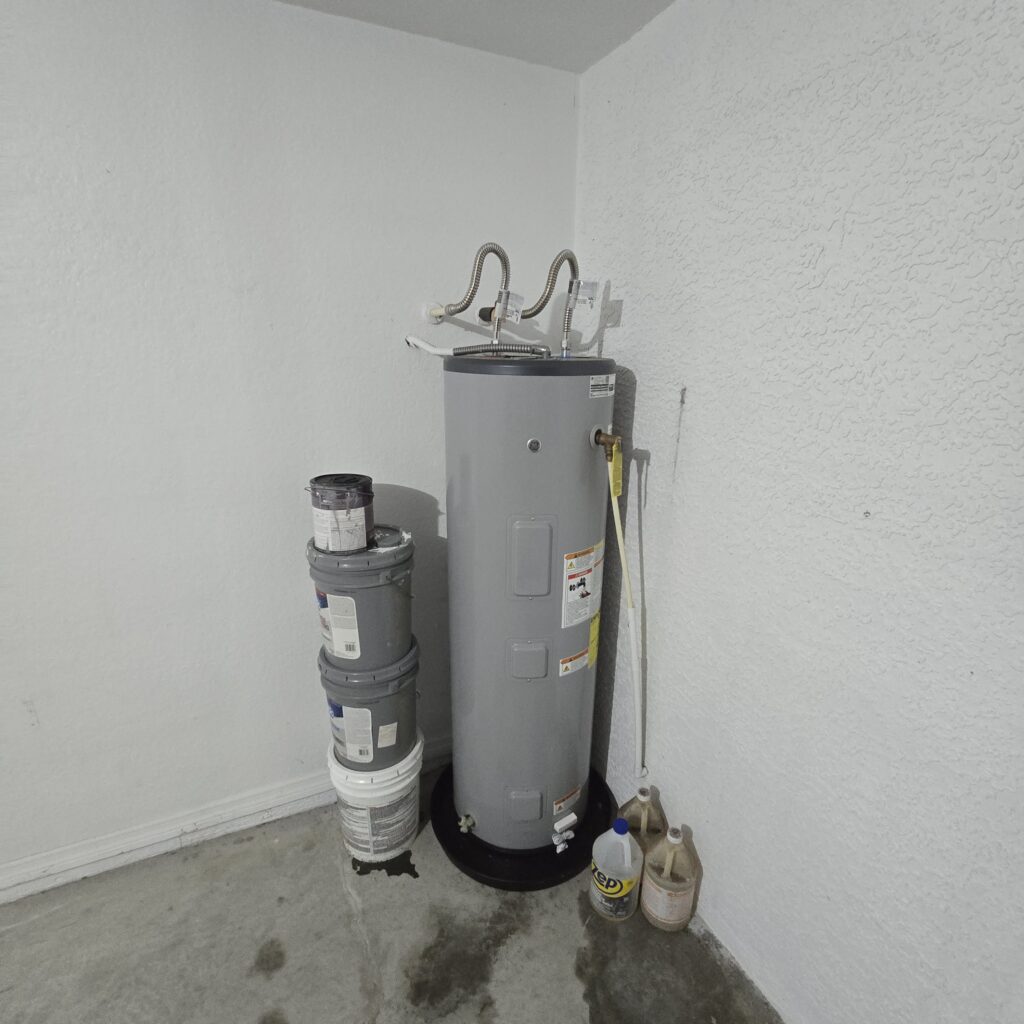
Most water heater breakdowns in cooler weather trace back to problems that started months earlier. Sediment that settled quietly all summer insulates the burner from the water, forcing longer heating cycles that overheat the tank bottom. That overheating weakens the steel and the glass lining, and the heavier winter workload finishes the job. Anode rods that corroded away during the year leave the tank itself exposed to rust. Pressure relief valves that seized up from mineral deposits fail exactly when winter pressure spikes need them most. Each of these failure points is easy to check in the fall. Each one is expensive and disruptive to discover in the winter. Prevention is always cheaper than emergency repair.
Cold weather breakdowns also tend to happen at the worst possible times. The first hard freeze of the year is when demand on your water heater peaks, and it is also when plumbers across Austin, Georgetown, and Pflugerville get flooded with emergency calls. A tank that bursts or a heater that dies during a freeze can leave your family without hot water for days. Worse, a leaking tank can dump 40 to 50 gallons onto your floor, damaging drywall, flooring, and belongings. Water damage claims from failed water heaters are among the most common homeowner insurance claims in the country. Exposed pipes connected to your water heater are also freeze risks, especially in garages and exterior utility closets. Insulating those lines during your fall prep takes minutes and prevents thousands in damage. Small steps now stop big disasters later.
The good news is that breakdown prevention follows a predictable checklist. Flush the tank, test the relief valve, inspect the anode rod, check the thermostat, and insulate exposed piping. Look for rust streaks, moisture around fittings, and corrosion on the gas line or electrical connections. Listen for popping or rumbling sounds, which signal heavy sediment inside the tank. Verify that the venting on gas units is clear and properly sloped, since blocked vents create carbon monoxide risks. If any of these checks reveal a problem, address it immediately rather than hoping it holds through winter. Noticing leaks, rust, or strange noises already? Click here for our water heater repair service. Fast action in the fall keeps your winter stress free.
Prep Your Water Heater to Lower Energy Bills in Cooler Weather
Water heating accounts for roughly 18 percent of the average home’s energy use, and cooler weather pushes that number higher. Every bit of inefficiency in your system gets magnified when the unit runs longer cycles against colder incoming water. Sediment is the biggest efficiency killer because it forms an insulating layer between the heat source and the water. Even a half inch of sediment can force your burner or elements to work dramatically harder for the same output. Flushing that sediment out before winter restores efficiency and shortens heating cycles. A clean tank heats faster, cycles less, and draws less energy all season long. The savings show up on every utility bill from October through March. Prep work literally pays for itself.
Insulation is the second major lever for lowering energy bills in cooler weather. Water heaters located in garages, attics, or unconditioned closets lose standby heat constantly to the cold air around them. An insulation blanket on an older electric tank can cut standby losses noticeably, though gas units require care to keep the blanket away from the burner, vents, and controls. Insulating the first six feet of hot and cold water pipes connected to the heater reduces heat loss and delivers hotter water to your fixtures faster. Foam pipe sleeves cost a few dollars and install in minutes. These small upgrades matter most during cold snaps when every degree of retained heat counts. Less heat lost means less energy purchased. Your water heater should not be heating your garage.
Thermostat settings and equipment choices round out your energy savings strategy. Setting the thermostat to 120 degrees provides comfortable hot water while limiting energy waste and scald risk. Settings above 140 degrees waste significant energy and accelerate mineral buildup inside the tank. If your unit is more than a decade old, its baseline efficiency is likely far below modern standards no matter how well you maintain it. Newer tank models and tankless systems deliver meaningful savings in homes with high winter hot water demand. Tankless units heat water on demand, so they never pay standby losses to a cold garage. Curious about upgrading before winter? Click here to learn about our tankless water heater services. An efficient system makes every cold month cheaper.
Water Heater Maintenance Steps to Prep for Cooler Weather
Prepping your water heater for cooler weather comes down to a handful of proven maintenance steps. The core tasks are flushing the tank, testing the temperature and pressure relief valve, checking the anode rod, and verifying thermostat settings. Supporting tasks include insulating exposed pipes, clearing the area around the unit, and inspecting venting on gas models. Each step targets a specific failure point that cold weather loves to exploit. Homeowners can handle some of these tasks with basic tools and caution. Others involve gas lines, electrical connections, or stubborn valves that deserve professional hands. The full routine takes a professional about an hour and takes a careful homeowner an afternoon. Done every fall, these steps can add years to your water heater’s service life.
Flush Your Water Heater Tank Before Cooler Weather
Flushing the tank is the single most important step when you prep your water heater for cooler weather. Central Texas has notoriously hard water, and minerals like calcium and magnesium settle out of the water and pile up at the bottom of your tank all year. That sediment layer blocks heat transfer, creates hot spots that damage the tank lining, and gives you less usable hot water capacity. It also causes the popping and rumbling noises many homeowners hear, which is steam bubbling up through the sediment bed. Left alone, sediment shortens tank life and can clog the drain valve permanently. Flushing removes this buildup before winter demand makes it worse. One flush per year is the minimum; homes with very hard water benefit from two. Fall is the ideal time because it puts a clean tank in front of the heavy season.
The flushing process is straightforward but requires attention to safety. Start by turning off the gas valve or flipping the electrical breaker so the unit cannot fire while empty. Shut off the cold water supply valve at the top of the tank. Connect a garden hose to the drain valve at the bottom and run the hose to a floor drain or outside. Open a hot water faucet somewhere in the house to break the vacuum, then open the drain valve and let the tank empty. Briefly opening the cold supply during draining stirs up remaining sediment and pushes it out. Watch the water exiting the hose; keep flushing until it runs clear. Cloudy or gritty water means more sediment is still coming out.
Refilling and restarting the unit correctly matters just as much as the flush itself. Close the drain valve, remove the hose, and open the cold water supply to refill the tank. Leave that hot water faucet open until water flows steadily from it, which confirms the tank is full and air has escaped. Only then should you restore power or relight the gas burner, because heating an empty tank destroys electric elements instantly. Check the drain valve for drips after the flush, since older plastic valves sometimes fail to reseal. Note how much sediment came out, because heavy buildup on an older tank may signal it is nearing the end. If your drain valve is clogged or the water never runs clear, call a professional rather than forcing it. A stuck valve on an aging tank is a warning sign worth respecting.
Test the Pressure Relief Valve When You Prep Your Water Heater
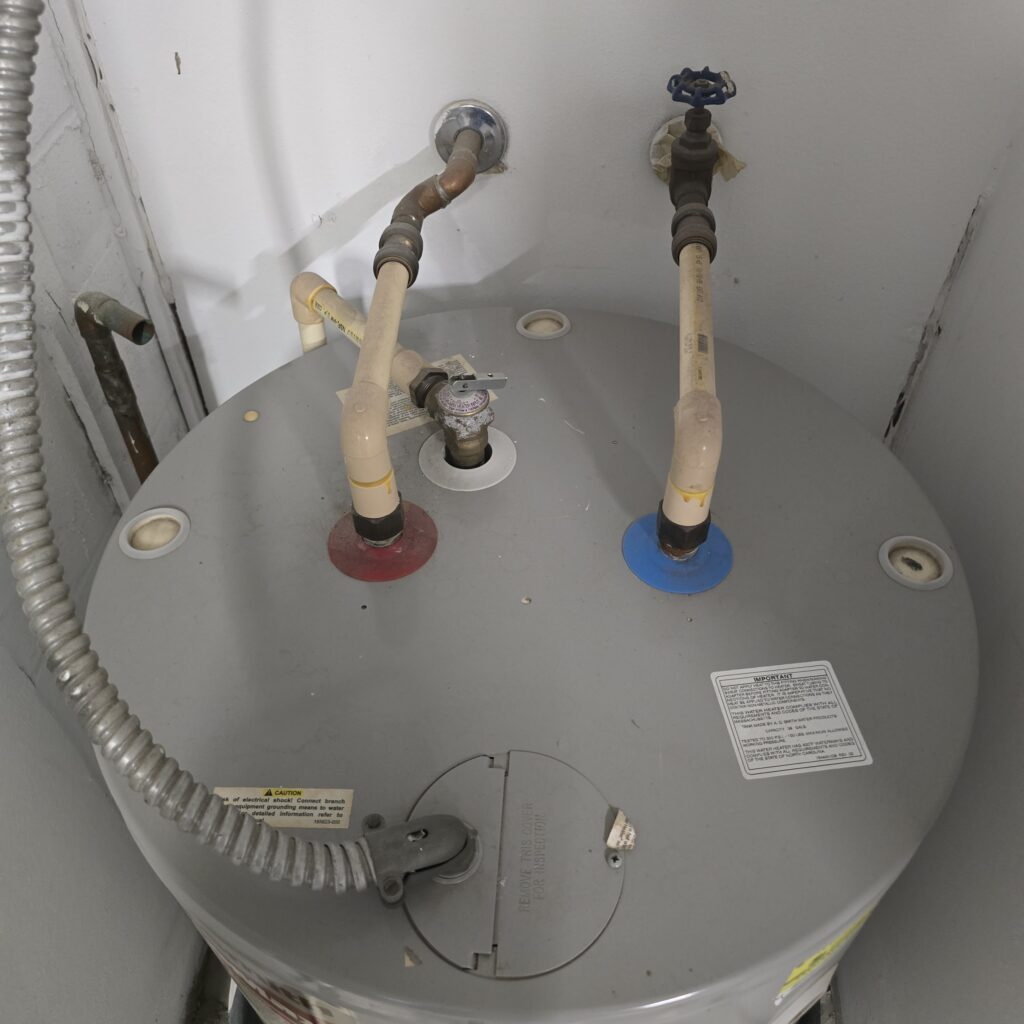
The temperature and pressure relief valve is the most important safety device on your water heater, and testing it belongs in every cooler weather prep routine. This valve opens automatically if pressure or temperature inside the tank climbs to dangerous levels, releasing water before the tank can rupture. Cooler weather raises the stakes because bigger temperature swings between cold incoming water and heated water create larger pressure spikes. A valve that seized up from mineral deposits during the summer will not open when winter pressure demands it. A tank with a failed relief valve and excessive pressure is genuinely dangerous. Testing takes less than five minutes. That five minutes protects your home and your family. Never skip this step.
Testing the valve is simple if you follow the right procedure. Locate the valve on the top or upper side of the tank; it has a lever and a discharge pipe running toward the floor. Place a bucket under the discharge pipe outlet and keep your hands and feet clear, because the water that comes out is scalding hot. Lift the lever partway and let it snap back. You should hear a rush of water into the discharge pipe, followed by a complete stop when the lever closes. If water flows, the valve works. If nothing comes out, the valve is blocked and must be replaced. If it keeps dripping afterward, the seal has failed and the valve also needs replacement.
A dripping or weeping relief valve sometimes points to a different problem entirely: thermal expansion. When your water heater heats a closed plumbing system, the expanding water has nowhere to go and pressure climbs with every cycle. An expansion tank mounted on the cold water line absorbs that pressure and protects the whole system. Expansion tanks fail over time as their internal bladders wear out, and a failed one leaves your relief valve doing a job it was never meant to do daily. Cooler weather makes expansion issues worse because the temperature rise per cycle is larger. Tap on your expansion tank; a healthy one sounds hollow on top, while a waterlogged one sounds solid. Think your expansion tank may be failing? Click here for our water heater expansion tank service. Fixing expansion problems in fall prevents relief valve abuse all winter.
Check the Anode Rod and Thermostat to Prep Your Water Heater for Cooler Weather
The anode rod is the unsung hero inside your water heater, and checking it is a smart part of cooler weather prep. This sacrificial metal rod, usually magnesium or aluminum, corrodes on purpose so the steel tank does not. Hard Texas water eats anode rods quickly, often consuming them in three to five years. Once the rod is gone, corrosion attacks the tank itself, and a rusted tank cannot be repaired, only replaced. Winter’s heavier workload accelerates that corrosion when no rod is left to absorb it. Checking the rod in fall tells you exactly where your tank stands. A rod that is more than half consumed or coated in calcium should be replaced. A 30 dollar rod can buy your tank several more years of life.
Inspecting the anode rod requires draining a few gallons and loosening a hex head fitting on top of the tank. The fitting is often extremely tight, and low ceilings can block a full length rod from coming out, so many homeowners hand this task to a plumber. When the rod comes out, look at its condition honestly. A healthy rod shows solid metal with light pitting along its length. A spent rod looks like a bare steel wire or is missing sections entirely. Rotten egg smells in your hot water can also trace back to anode reactions with certain water chemistry, and a rod swap often fixes it. Flexible segmented rods solve the ceiling clearance problem in tight installations. If your rod is gone and the tank is over ten years old, start planning for replacement now rather than mid winter.
The thermostat check finishes your cooler weather prep and takes only minutes. Set gas control valves or electric thermostats to 120 degrees for the best balance of comfort, safety, and efficiency. Electric units have two thermostats behind access panels, and both should match; always kill power at the breaker before opening those panels. While you are there, inspect wiring for scorch marks and connections for corrosion. On gas units, check that the flame burns steady blue, not lazy yellow, since yellow flames signal combustion problems. Confirm the venting is intact, sloped upward, and free of rust holes or gaps. Clear at least two feet of space around the unit and never store flammables near a gas water heater. If any reading, flame, or connection looks wrong, stop and get a professional inspection before winter arrives.
Why You Need a Professional Water Heater Inspection Before Cooler Weather
Homeowner maintenance covers the basics, but a professional inspection catches what untrained eyes miss. Licensed plumbers test gas pressure, combustion quality, electrical draw, and tank integrity with tools most homeowners do not own. They also spot early warning signs like micro leaks, vent corrosion, and failing dip tubes before those problems become winter emergencies. An inspection in the fall gives you time to schedule any repairs on your terms. It also documents your unit’s condition, which helps with warranty claims and replacement planning. Ready to get ahead of the cold? Click here for our water heater inspection service.
What a Professional Water Heater Inspection Includes
A professional water heater inspection is a complete health check of your entire hot water system. The plumber examines the tank exterior for rust, dents, and moisture, then checks every fitting and connection for leaks. Gas units get a combustion analysis, flame inspection, and vent draft test to rule out carbon monoxide risks. Electric units get element and thermostat testing with a multimeter to confirm proper operation. The relief valve, expansion tank, and shutoff valves are all tested for function, not just looked at. You receive a clear report of what is healthy, what is marginal, and what needs attention before winter.
The inspection also covers the parts of the system beyond the tank itself. Your plumber checks the water supply lines feeding the heater and the hot lines leaving it for corrosion, kinks, and proper insulation. Drain pans and drain lines get verified so a future leak routes safely away instead of into your flooring. Water pressure gets measured at the fixture level, because high household pressure quietly destroys water heaters from the inside. Sediment levels get assessed to determine how urgently the tank needs flushing. This whole system view is what separates a real inspection from a quick glance.
Perhaps the most valuable part of a professional inspection is the honest lifespan assessment. An experienced plumber can tell you if your unit has five good years left or five risky months. That judgment considers tank age, anode condition, sediment history, water quality, and visible wear together. Homeowners armed with that information can budget for replacement instead of getting blindsided. If replacement makes sense, you can compare tank and tankless options calmly in October instead of desperately in January. Knowledge before winter is the whole point of fall prep.
When to Schedule Your Water Heater Inspection for Cooler Weather
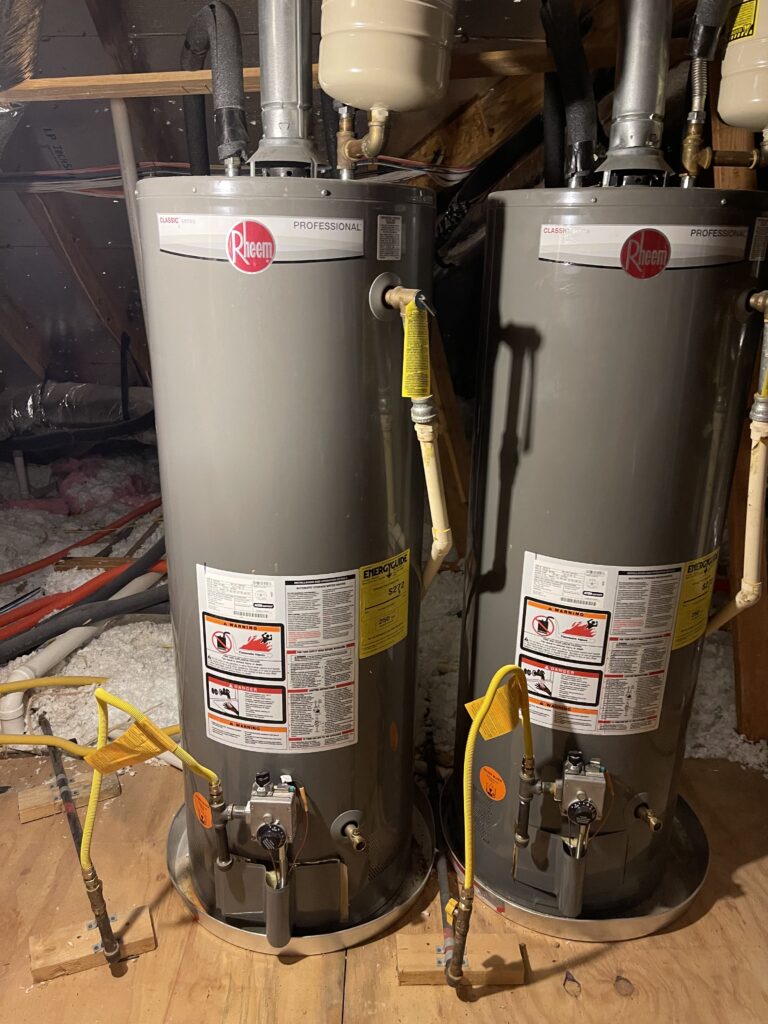
Timing your inspection right makes all the difference for cooler weather readiness. The ideal window in Central Texas runs from late summer through mid fall, before the first real cold front arrives. Scheduling early means any repairs or replacements happen while parts are available and schedules are open. It also means your water heater enters the heavy season already verified and tuned. Waiting until November or December puts you in competition with every emergency call in the area. Early birds get convenience; procrastinators get cold showers.
Certain situations call for an inspection sooner rather than later, regardless of the calendar. Any water heater over eight years old deserves an annual professional look before each winter. Units that make rumbling noises, produce rusty water, or recover slowly need attention now. Homes that have never had the tank flushed are carrying years of sediment into the high demand season. New homeowners should always get an inspection because they inherit an unknown maintenance history. If any of these describe your situation, do not wait for the weather to turn.
Bundling your inspection with other fall plumbing tasks saves time and money. A single visit can cover the water heater, exposed pipe insulation, outdoor faucet checks, and shutoff valve testing. This whole home approach preps your entire plumbing system for freezing temperatures at once. Central Texas freezes are short but brutal, and burst pipes cause more damage here than almost any other plumbing failure. One appointment in the fall beats multiple emergencies in the winter. Smart scheduling turns winter prep into a simple annual routine.
Why Choose Whitestone Plumbing for Your Water Heater Prep
Whitestone Plumbing brings over 20 years of plumbing experience to every water heater we touch. We are a locally owned and operated company based in Cedar Park, so we know exactly how Central Texas water and weather punish water heaters. Our technicians are licensed and insured, and we keep a backflow licensed and certified technician on staff. We serve Cedar Park, Leander, Round Rock, Georgetown, Austin, Pflugerville, Jonestown, Lago Vista, and Hudson Bend. When you call us, you get neighbors who answer to this community. That local accountability shows in every job we complete.
We believe great plumbing starts with honest communication. Whitestone Plumbing provides free estimates with clear, honest pricing before any work begins. You will never face surprise charges or pressure to buy services you do not need. If your water heater just needs a flush and a new anode rod, that is exactly what we will recommend. If it needs replacement, we will show you why and walk you through the options. Ethos is not a buzzword to us; it is how we have built our reputation.
Cooler weather does not wait, and neither do water heater failures. Whitestone Plumbing offers 24/7 emergency plumbing, so a midnight breakdown during a cold snap never leaves you stranded. We are dedicated to always providing a 5 star service on every call, from routine inspections to full installations. Call us today at (512) 826-6217 or email info@callwhitestone.com to schedule your fall water heater prep. Visit us at 702 Dewberry Dr, Cedar Park, TX 78613. Get your water heater ready before the first cold front, and enjoy reliable hot water all season.