
How To Stop A Running Toilet From Wasting Gallons
A running toilet is one of the most expensive plumbing problems that homeowners ignore. The EPA estimates that a constantly running toilet can waste up to 200 gallons of water every single day. That adds up to thousands of gallons each month, and your water bill will show it. During a hot Texas summer, when water usage is already high from irrigation and extra showers, a running toilet pushes your utility costs even higher. The good news is that most running toilets are caused by a handful of common problems inside the tank. Some of these fixes take ten minutes and a five dollar part. Others point to deeper issues that need a licensed plumber. This guide explains what causes a running toilet, how to fix it, and when to call for professional toilet repair.
What Causes a Running Toilet to Waste Water
Every running toilet comes down to one simple fact: water is escaping from the tank when it should be sitting still. The tank is designed to fill to a set level after each flush, then shut off completely until the next use. When any component inside that tank fails, water leaks into the bowl or drains through the overflow tube, and the fill valve keeps refilling to compensate. That cycle repeats around the clock, even while you sleep. The three most common culprits are a worn flapper, a faulty fill valve, and problems with the flush valve or chain. Each one has its own warning signs, and each one wastes water at a different rate. Identifying the exact cause is the first step to stopping the waste. Here is how to diagnose all three.
A Worn Flapper Causes a Running Toilet
The flapper is the rubber seal at the bottom of your toilet tank that lifts when you flush and drops back down to hold water in the tank. It is the single most common cause of a running toilet in American homes. Rubber degrades over time, especially in areas like Central Texas where hard water and chlorinated municipal supply accelerate wear. A flapper typically lasts three to five years before it warps, cracks, or loses its flexibility. Once the seal fails, water slowly leaks from the tank into the bowl without ever touching the handle. This is often called a silent leak because you may not hear obvious running water. You might only notice a faint hiss, a ripple in the bowl, or the toilet refilling on its own every few minutes. That phantom refill is your tank replacing the water that leaked out.
Testing for a bad flapper is simple, and you can do it in fifteen minutes with items from your kitchen. Remove the tank lid and add ten drops of food coloring to the tank water. Do not flush, and wait fifteen to twenty minutes. Check the bowl afterward; colored water in the bowl means the flapper is leaking. This dye test catches even slow leaks that waste dozens of gallons per day. A slow flapper leak can waste 20 to 30 gallons daily, while a badly failed flapper can waste hundreds. Multiply that over a month and you are paying for a small swimming pool worth of water you never used. The test costs nothing and gives you a definitive answer.
Replacing a flapper is one of the easiest toilet repairs a homeowner can attempt. Turn off the water supply valve behind the toilet, flush to empty the tank, and unhook the old flapper from the pegs on the overflow tube. Detach the chain from the flush lever arm and take the old flapper to the hardware store to match the size. Most residential toilets use a two inch flapper, though many newer high efficiency models use a three inch version. Install the new flapper, reconnect the chain with about half an inch of slack, and turn the water back on. Run the dye test again to confirm the seal holds. If the leak continues after a new flapper, the flush valve seat itself may be corroded or pitted, and that is a job for a professional.
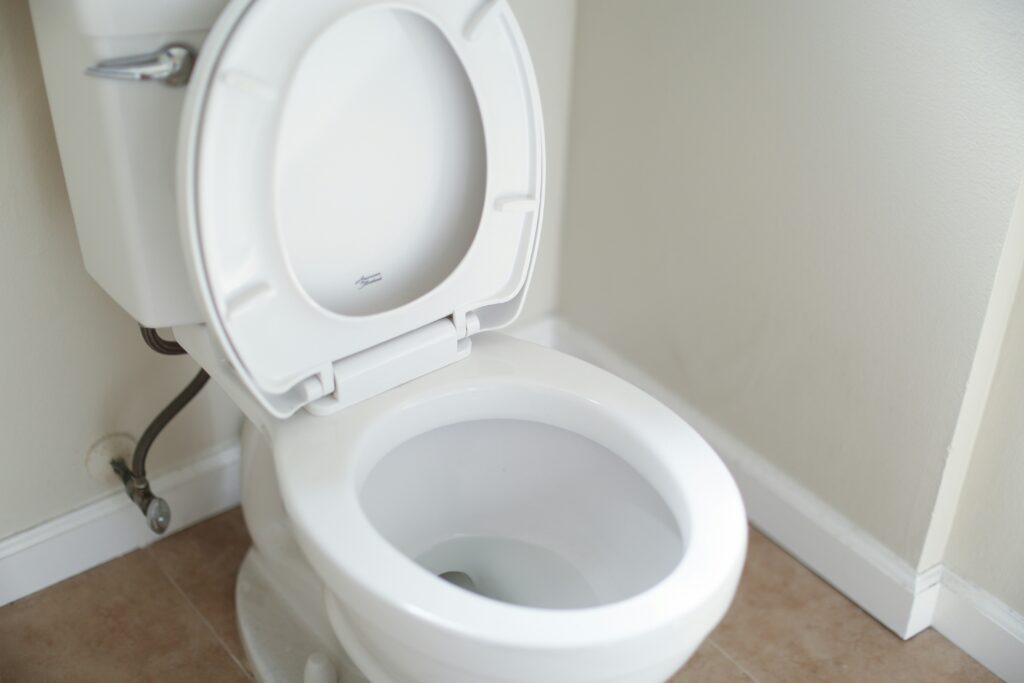
Fill Valve Problems That Cause a Running Toilet
The fill valve is the tall assembly on the left side of your tank that refills the tank after every flush. When it works correctly, it shuts off the moment the water reaches the fill line. When it fails, it either never shuts off or cycles on and off repeatedly throughout the day. A hissing sound coming from the tank is the classic symptom of a failing fill valve. Debris and mineral sediment from hard water can clog the valve internals and prevent a full seal. Cedar Park, Leander, and the surrounding Hill Country communities have notoriously hard water, which shortens fill valve life considerably. A fill valve that runs constantly can waste more water than a bad flapper because the flow never stops. Left alone, it can push a monthly water bill up by 50 dollars or more.
Sometimes the fill valve itself is fine, but the float is set too high. The float tells the valve when to shut off, and if it is adjusted above the overflow tube, water pours down the tube endlessly. Look inside your tank while it refills and watch the water level. The correct level is about one inch below the top of the overflow tube, and many tanks have a stamped fill line to guide you. Older ballcock style valves use a long arm with a floating ball; bend the arm slightly downward to lower the shutoff point. Modern valves use a float cup with an adjustment screw or clip that slides up and down the shaft. Turn the screw counterclockwise or slide the clip down to lower the water level. A thirty second adjustment can stop gallons of daily waste.
If adjusting the float does not stop the running, the valve needs cleaning or replacement. You can flush debris by shutting off the supply, removing the valve cap, holding a cup over the opening, and turning the water on briefly to blast sediment out. When that fails, full replacement is the answer, and a new fill valve costs 15 to 25 dollars at any hardware store. The job requires shutting off the supply, draining the tank, disconnecting the supply line, and swapping the assembly. Homeowners with basic tools can handle it, but overtightening the plastic lock nut is a common mistake that cracks the tank or causes leaks at the base. A cracked tank turns a 20 dollar repair into a full toilet replacement. Not sure your fill valve is the problem? Click here for our professional toilet repair service and let a licensed plumber diagnose it correctly the first time.
Flush Valve and Chain Issues Behind a Running Toilet
The flush valve is the drain seat at the bottom of the tank that the flapper seals against, and the chain connects the flapper to the flush handle. Problems with either one will keep a toilet running long after the flush is done. A chain with too much slack can slip underneath the flapper and prop it open, letting water pour into the bowl continuously. A chain that is too tight does the opposite; it holds the flapper slightly off the seat so it never fully closes. The fix is to adjust the chain length so there is roughly half an inch of slack when the flapper is seated. Kinked or corroded chains should be replaced entirely, and they cost only a few dollars. Also check the flush handle itself, because a sticking handle keeps tension on the chain. Jiggling the handle to stop a running toilet is a sure sign of a chain or handle problem.
The flush valve seat is a more serious failure point. Years of mineral buildup, chlorine tablets, and general corrosion can pit or roughen the plastic seat where the flapper lands. Once the seat is damaged, even a brand new flapper cannot form a watertight seal. You will know this is the problem when you replace the flapper and the dye test still shows leaking. Drop in chlorine tank tablets are a major cause of this damage, and most plumbers recommend avoiding them completely. The chlorine sits concentrated in the tank and eats away at rubber and plastic components years ahead of schedule. Repair options include a flush valve seat repair kit that glues a new seat over the old one, or a full flush valve replacement.
Replacing a flush valve is significantly more involved than swapping a flapper or fill valve. The tank must be completely removed from the bowl, because the flush valve is secured by a large nut on the underside of the tank. That means disconnecting the supply line, removing the tank bolts, lifting the tank off, and replacing the gasket that seals the tank to the bowl. Reassembly requires even torque on the tank bolts to prevent cracking the porcelain. Many homeowners start this job and end up with a leaking tank gasket or a hairline crack. If your toilet is more than 15 years old, the labor may be better spent on a new high efficiency toilet that saves water on every flush. Thinking about an upgrade instead of another repair? Click here for our toilet installation service to see your options.
How to Fix a Running Toilet Step by Step
Now that you know the common causes, here is the practical process to fix a running toilet in the correct order. Working through these steps systematically saves you from replacing parts that were never broken. Always start by removing the tank lid and simply watching what happens during a flush cycle. Observation tells you more than guesswork ever will. Keep a towel handy, and know where your toilet shutoff valve is before you begin. The valve is on the wall behind the toilet, and turning it clockwise stops all water to the fixture. Most running toilet repairs need nothing more than a pair of pliers and ten minutes of patience. Follow the steps below and test after each one so you know exactly which fix solved the problem.
Fix a Running Toilet by Checking the Flapper First
Start every running toilet diagnosis with the flapper, because it is the most likely offender. Shut off the water supply and flush the toilet to drain the tank. Inspect the flapper closely for warping, mineral crust, cracks, or a slimy degraded texture. Run your finger along the edge of the flapper; if rubber residue comes off on your skin, the flapper is done. Check that it sits flush and centered on the flush valve seat with no gaps. Look at the seat itself for chips, pits, or mineral deposits that could break the seal. Wipe the seat clean with a cloth, because sometimes a piece of grit is the entire problem. Reassemble, turn the water on, and run the food coloring dye test to confirm the seal.
If the flapper looks worn at all, replace it rather than trying to clean and reuse it. Flappers are the cheapest part in the tank, and a new one eliminates the variable entirely. Match the replacement to your toilet brand and flush valve size for the best seal. Universal flappers work on most toilets, but brand specific flappers fit certain models like Kohler and TOTO much better. Adjustable flappers with a float or dial should be set according to the package instructions to maintain proper flush volume. Setting them wrong can cause weak flushes or, ironically, more running. Hook the new flapper onto the overflow tube pegs and confirm it moves freely. A flapper that binds on its hinges will hang open and keep the toilet running.
After installation, flush several times and watch the full cycle from start to finish. The flapper should lift cleanly, stay up long enough for a complete flush, then drop and seal as the tank refills. Confirm the fill valve shuts off completely and the tank goes silent. Repeat the dye test one more time and wait a full twenty minutes. No color in the bowl means the leak is fixed and your water waste has stopped. Mark the date on your calendar, because flappers in hard water areas should be checked yearly and replaced every three years or so. This small habit prevents silent leaks from returning unnoticed. A three dollar part checked annually can save thousands of gallons over the life of your toilet.
Fix a Running Toilet by Adjusting the Water Level
If the flapper checks out, the water level is your next target. Turn the supply back on, let the tank fill, and watch where the water stops. Water rising above the overflow tube and spilling down it means the fill level is set too high. This condition wastes water constantly, because the fill valve never gets to shut off. Locate the fill line stamped inside the tank, usually about one inch below the top of the overflow tube. Your goal is to bring the resting water level down to that line. The adjustment method depends on the style of fill valve in your tank. Take a photo of your valve before adjusting so you can reference the original position if needed.
For modern float cup valves, look for an adjustment screw on top of the valve or a pinch clip on the float rod. Turning the screw counterclockwise lowers the float, which lowers the shutoff level. For older ballcock valves with a float ball on a brass arm, gently bend the arm downward to achieve the same result. Make small adjustments and flush between each one to check the new fill level. Rushing the adjustment often overshoots and leaves you with a weak flush from too little tank water. The sweet spot gives you a full flush while keeping the water safely below the overflow tube. Once the level holds steady at the fill line, listen for total silence from the valve. Any continued hissing means the valve internals are failing and adjustment alone will not fix it.
A failing fill valve should be replaced, not endlessly adjusted. Replacement valves are inexpensive, universal models fit nearly all toilets, and the swap takes about 30 minutes for a confident DIYer. Shut off the supply, flush, sponge out the remaining tank water, and disconnect the supply line from the valve base. Remove the lock nut under the tank, lift out the old valve, and set the new one to the correct height per the instructions. Hand tighten the new lock nut plus a quarter turn with pliers, and never crank down hard on plastic threads. Reconnect the supply line, turn on the water, and check for drips under the tank. Set the fill level, flush a few times, and confirm clean shutoff. If anything leaks or the toilet still runs, stop and call a professional before water damage spreads.
Fix a Running Toilet by Ruling Out Hidden Leaks
Sometimes a toilet that seems to run randomly is actually revealing a bigger plumbing problem. A toilet that refills every 15 minutes with a perfect flapper and fill valve may be losing water through a cracked overflow tube or a hairline fracture in the tank itself. Inspect the overflow tube for cracks below the waterline, because water escaping through a crack drains the tank invisibly. Check the tank exterior and the floor around the toilet base for moisture. Condensation is normal in summer humidity, but pooling water is not. A leaking tank to bowl gasket lets water seep out between flushes and triggers constant refilling. These hidden failures waste water just like a bad flapper, but they also threaten your subfloor.
Water pressure problems can also masquerade as toilet trouble. Homes with pressure above 80 PSI put constant stress on fill valves, causing them to fail early and repeatedly. If you have replaced the same fill valve twice in a few years, have your home’s water pressure tested. High pressure damages far more than toilets; it shortens the life of water heaters, supply lines, and every fixture in the house. A pressure reducing valve at the main line solves the problem at the source. Sediment from aging supply lines is another repeat offender, clogging valve seals over and over. In older Austin and Round Rock homes, deteriorating galvanized pipes shed debris that no tank part replacement can outrun. Recurring toilet problems are often a symptom, not the disease.
Finally, confirm the running toilet is not part of a larger leak picture on your property. Check your water meter with all fixtures off; a spinning leak indicator means water is moving somewhere it should not be. Compare your current water bill to the same month last year and investigate any unexplained jump. A single running toilet can add thousands of gallons to a billing cycle, but so can slab leaks and underground supply line failures. Homeowners often blame the toilet when the real leak is hiding under the foundation. Professional leak detection pinpoints the source without tearing up floors or walls. Suspect your water waste goes beyond the toilet? Click here for our leak detection service and get a definitive answer.
Why You Need Professional Running Toilet Repair
DIY fixes solve many running toilets, but not all of them, and the cost of getting it wrong is real. A cracked tank, a stripped supply line fitting, or a botched flush valve job can flood a bathroom in minutes. Water damage restoration costs thousands, while professional toilet repair costs a small fraction of that. A licensed plumber diagnoses the true cause in one visit instead of a trial and error parts parade. Professionals also spot the underlying issues, like high water pressure or failing supply lines, that keep bringing the problem back. When the fast fixes fail, the smart move is to bring in an expert.
Professional Running Toilet Repair Saves Water and Money
Every day a toilet runs, money drains out of your budget one gallon at a time. At 200 gallons per day, a running toilet wastes 6,000 gallons in a single month. Central Texas water rates climb steeply at higher usage tiers, so waste is billed at your most expensive rate. Many homeowners discover the problem only when a shocking bill arrives. A professional repair stops the waste immediately and permanently. The repair typically pays for itself within one or two billing cycles.
Professional repair also protects you from repeat failures. A plumber installs commercial grade components instead of the bargain parts that fail in a year. They test water pressure, inspect the shutoff valve, and examine the supply line during the same visit. These checks catch problems before they become emergencies. Small angle stop valves behind toilets are notorious for seizing or leaking when homeowners touch them for the first time in a decade. A pro handles all of it safely in one appointment.
There is also the conservation angle, which matters more every summer in Texas. Drought conditions and watering restrictions make every wasted gallon a community problem. Fixing running toilets is one of the highest impact water conservation steps a homeowner can take. It requires no lifestyle change and no sacrifice. The water you save stays in the aquifer and off your bill. That is a rare win for both your wallet and your neighbors.
Professional Running Toilet Repair Prevents Bigger Plumbing Damage
A running toilet is sometimes the first visible symptom of a failing plumbing system. Plumbers frequently trace chronic toilet problems back to pressure issues, corroded supply lines, or sediment from aging pipes. Treating only the toilet means the real problem keeps working in the background. That hidden problem eventually surfaces as a burst supply line or a slab leak. Professional diagnosis connects the dots that a parts swap cannot. Catching the root cause early is dramatically cheaper than repairing water damage later.
Toilets also fail in ways that damage the home directly. A leaking tank to bowl gasket drips onto the floor behind the toilet where nobody looks. A compromised wax ring lets flush water seep under the flooring with every use. Over months, that moisture rots subfloors, feeds mold, and stains ceilings below second floor bathrooms. A licensed plumber inspects these failure points during any toilet repair visit. Five minutes of professional inspection can prevent a five thousand dollar floor replacement.
Timing matters, and running toilets never fix themselves. Rubber parts only degrade further, seals only leak more, and bills only climb higher. Waiting through the summer means paying peak seasonal water rates on wasted gallons. Emergencies also tend to strike at the worst moments, like a fill valve that fails wide open while you are away for a weekend. Prompt professional repair removes that risk entirely. One scheduled visit beats one flooded bathroom every time.
Why Choose Whitestone Plumbing
Whitestone Plumbing is a locally owned and operated plumbing company based in Cedar Park, Texas. Our team brings over 20 years of plumbing experience to every toilet repair, big or small. We serve Cedar Park, Leander, Round Rock, Georgetown, Austin, Pflugerville, and the surrounding communities. Local ownership means we answer to our neighbors, not a national franchise office. Our reputation is built on honest work in the same neighborhoods where we live. That accountability shows in every job we complete.
We offer free estimates with clear, honest pricing before any work begins. You will know the full cost upfront, with no surprise fees added at the end. Our technicians are licensed and insured, and we employ a backflow licensed and certified technician for specialized work. Every repair is performed to code and backed by our commitment to doing the job right. We are dedicated to always providing 5 star service on every call. Transparent pricing and licensed expertise are the standard here, not the upgrade.
Plumbing problems do not wait for business hours, and neither do we. Whitestone Plumbing offers 24/7 emergency plumbing service across our entire service area. A running toilet at midnight or a burst supply line on a holiday gets the same fast response. Call us at (512) 826-6217 or email info@callwhitestone.com to schedule your repair. You can also visit us at 702 Dewberry Dr, Cedar Park, TX 78613. Stop wasting water today and let our team fix your running toilet right the first time.