
How To Shut Off Your Water Supply In An Emergency
A burst pipe can flood your Cedar Park home with hundreds of gallons of water in just minutes, turning a small plumbing problem into thousands of dollars in damage. Knowing how to shut off your water supply in an emergency is one of the most important skills every homeowner should learn before disaster strikes. The main water shut-off valve stops all water flow into your home, giving you time to call a licensed plumber and prevent further damage. Most homeowners never think about this valve until water is already pouring through their ceiling or pooling across their kitchen floor. Taking five minutes today to locate and test your shut-off valve could save you from a major insurance claim tomorrow. This guide walks you through everything you need to know about emergency water shut-off procedures. You will learn where to find your valves, how to operate them correctly, and what steps to take once the water is off. Whitestone Plumbing has helped Central Texas families handle plumbing emergencies for over 20 years, and we want every homeowner to feel prepared.
How To Shut Off Your Water Supply At The Main Valve
The main water shut-off valve controls every drop of water entering your home from the municipal supply line. This single valve is your most powerful tool during any plumbing emergency, from a burst pipe to a failed water heater. Finding it before you need it is critical because emergencies rarely give you time to search. In most Cedar Park and Round Rock homes, the main valve sits near the front foundation wall, inside a garage, or in an exterior utility box near the street. Every adult living in your home should know exactly where this valve is and how to turn it. We also recommend testing the valve once or twice a year to make sure it still operates smoothly when you need it most.
Locating The Main Water Shut Off Valve In Your Home
Finding your main water shut-off valve starts with a quick walk around the perimeter of your house. In Central Texas, builders typically install the valve on the side of the home closest to the street, often near the hose bib at the front of the foundation. You may see a brass or chrome valve sticking out of the ground or mounted on a copper pipe that rises from the dirt. Some homes have the valve hidden inside a small green or black plastic box at ground level, which lifts off with a screwdriver or your fingers. Garages are another common spot, especially in newer construction, where the valve sits along the wall shared with the front yard. If you cannot find an interior or foundation valve, the city water meter box near the curb has a shut-off that works just as well.
The water meter box at the street holds the city-side shut-off, which is the backup option if your main valve fails or cannot be found. This box is usually a rectangular concrete or plastic lid set into the ground near the sidewalk or curb. Lifting the lid requires a flathead screwdriver, a meter key, or sometimes just a sturdy pull on the metal tab. Inside, you will see the water meter itself and a valve with a small rectangular nub or a lever handle. Operating this valve usually requires a curb key, which is a long T-shaped tool you can buy at any hardware store for under twenty dollars. Keeping a curb key in your garage alongside a flashlight gives you a reliable backup when seconds matter during a major leak.
Mark your main shut-off valve location once you find it so anyone in the house can spot it quickly. A bright piece of colored tape, a small flag, or a printed label attached to the wall above the valve works perfectly for this. Take a photo of the valve location on your phone and text it to every adult in the household for easy reference. Share the location with regular guests, house sitters, and older children who might be home alone during a leak. If you have a multi-story home, write the location down and tape it inside a kitchen cabinet door for visiting family members. Spending ten minutes on this small project today protects your home for every year you live there.
Operating The Main Water Shut Off Valve Correctly
Once you locate your main water shut-off valve, you need to know what type of valve you have because each one operates differently. Most modern homes in the Cedar Park area use a ball valve, which has a straight metal lever handle that turns a quarter turn to open or close. When the lever sits parallel to the pipe, water flows freely through the line into your home. When you turn the lever so it sits perpendicular to the pipe, the valve is fully closed and water stops immediately. Older homes often have a gate valve instead, which uses a round metal wheel that you turn clockwise to close. Gate valves can require several full rotations to fully shut, so do not stop turning until the wheel will not move any further.
Turning the valve in the wrong direction or forcing a stuck handle can break the valve and make your emergency much worse. The standard rule is “righty tighty, lefty loosey,” meaning you turn the handle clockwise to close the valve and stop water flow. For ball valves, push the lever a quarter turn until it stops naturally; never force it past the stopping point. For gate valves, turn the wheel slowly and steadily clockwise until it stops, then back off just a tiny fraction to relieve pressure on the seal. If the valve feels stuck, spray it with penetrating oil and wait five minutes before trying again with steady pressure. Calling a plumber for a stuck valve is far cheaper than repairing a snapped pipe and flooded floor.
After you close the main valve, open the lowest faucet in your home, such as an outdoor hose bib or basement utility sink, to drain remaining water from the pipes. This step relieves pressure inside your plumbing system and stops water from continuing to leak out of the damaged area. Next, open the highest faucet in your home, like an upstairs bathroom sink, to break the vacuum and let air into the lines. You should hear water trickle and then stop within a minute or two as the system fully drains down. Check your damaged area to confirm the leak has stopped before moving on to cleanup or repairs. Need emergency plumbing help right now? Click here for our burst pipe repair service.
Testing Your Main Water Shut Off Valve Regularly
Testing your main water shut-off valve once or twice a year ensures it will actually work when you need it during an emergency. Valves can seize up over time from mineral deposits, corrosion, or simply from sitting unused for years in our hard Central Texas water. A frozen valve during a real emergency forces you to wait for a plumber or city worker to arrive, which can mean hours of additional flooding. Schedule your valve test alongside another seasonal task like changing smoke detector batteries or replacing HVAC filters. Pick a calm afternoon when you have time to address any problems you discover during the test. Testing takes about ten minutes from start to finish and gives you confidence that your safety system is ready.
Start your test by turning off any appliances that use water, including the dishwasher, washing machine, and ice maker, to avoid damaging them during the shut-off. Close the main valve slowly using the correct direction for your valve type, then go inside and turn on a faucet to confirm water stops flowing. A working valve will produce a quick spurt of water followed by air and then nothing as the lines drain. If water continues to flow at full pressure, the valve is not sealing properly and needs professional repair or replacement. Turn the valve back to the open position slowly to avoid water hammer, which is the loud banging sound that can damage pipes. Run your faucets for a minute afterward to flush any sediment that loosened during the test.
If your valve sticks, leaks around the handle, or refuses to fully close during testing, replace it before you have a real emergency. Old valves in Cedar Park homes often suffer from calcium buildup that prevents full closure, which means a burst pipe will keep flooding even with the valve “closed.” A licensed plumber can replace a main shut-off valve in about an hour for a reasonable cost, and the peace of mind is worth every penny. Upgrading from an old gate valve to a modern ball valve also makes future emergencies much easier to handle quickly. Consider adding a secondary shut-off valve closer to the interior of your home if your main valve is buried or hard to reach. Want professional help with your shut-off valves? Click here for our water supply lines service.
How To Shut Off Your Water Supply At Individual Fixtures
Not every plumbing emergency requires shutting down water to the entire house, and individual fixture shut-off valves give you a more targeted response option. Toilets, sinks, washing machines, and water heaters all have their own dedicated shut-off valves located right next to the fixture they serve. Using these smaller valves lets the rest of your home keep running water while you address the specific problem. This approach is especially helpful for slow leaks under a sink or a running toilet that needs repair. Knowing where each fixture valve sits saves time and reduces inconvenience during a focused plumbing emergency. Every homeowner should walk through their house once and locate every fixture shut-off before any problem arises.
Shutting Off The Water Supply To Toilets And Sinks
Toilet shut-off valves sit on the wall directly behind or beside the toilet, usually about six inches above the floor where the supply line meets the wall. Most toilet valves are small chrome or brass fixtures with an oval or football-shaped handle that turns clockwise to close. A running, overflowing, or leaking toilet is one of the most common plumbing emergencies in Cedar Park homes, especially in households with older fill valves. Closing the supply valve stops water from refilling the tank and gives you time to call a plumber or attempt a basic repair. After closing the valve, flush the toilet once to drain remaining water from the tank, which makes any repair work cleaner and easier. Test your toilet valves once a year because they often seize up from sitting in one position for many years.
Sink shut-off valves are located inside the cabinet directly under the sink, with separate valves for the hot and cold supply lines. Each valve looks similar to a toilet valve and operates the same way, turning clockwise to close and counterclockwise to open. Most kitchen and bathroom sinks have two valves side by side, one feeding the hot water line and one feeding the cold. A leaking faucet, broken supply line, or damaged garbage disposal connection can all be stopped quickly by closing these under-sink valves. Clear out items stored under your sink so you can reach the valves fast during an emergency. Old metal valves can become difficult to turn over time, so test them gently and replace any that feel stuck or corroded.
If a sink or toilet valve will not close completely or starts to drip when you operate it, do not force it because you might break the valve entirely. Modern quarter-turn valves are much more reliable than the older multi-turn varieties, and replacing them is a straightforward job for any licensed plumber. A failed fixture valve forces you to shut off water to the whole house, which is exactly what you were trying to avoid by having local valves. Upgrading your fixture valves during a bathroom or kitchen remodel adds long-term reliability for very little additional cost. Keep a small adjustable wrench in your kitchen junk drawer for quick access if a valve needs gentle persuasion. Building a habit of checking these valves twice a year prevents most emergency surprises.
Shutting Off The Water Supply To Appliances
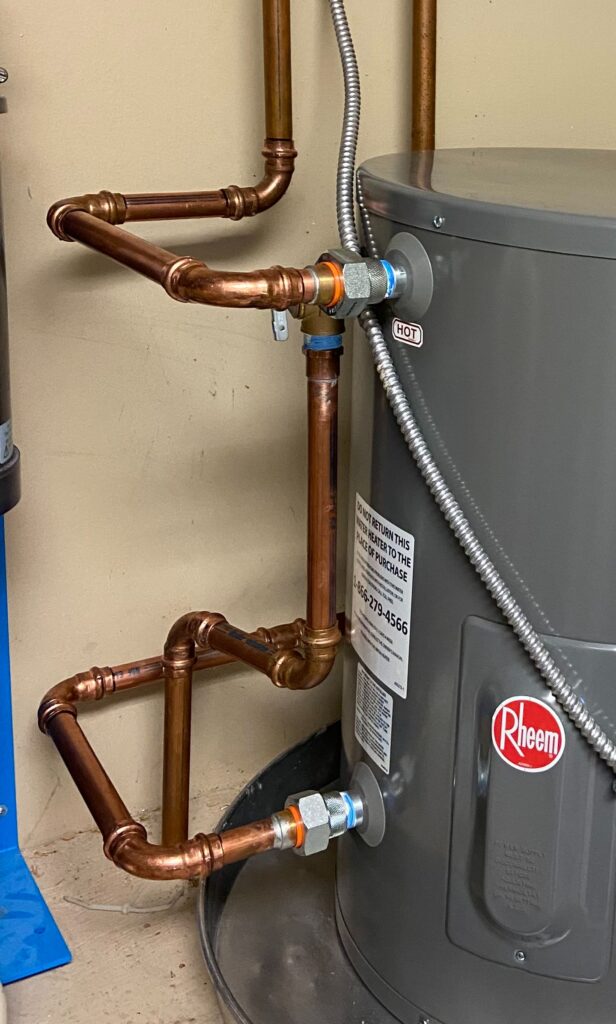
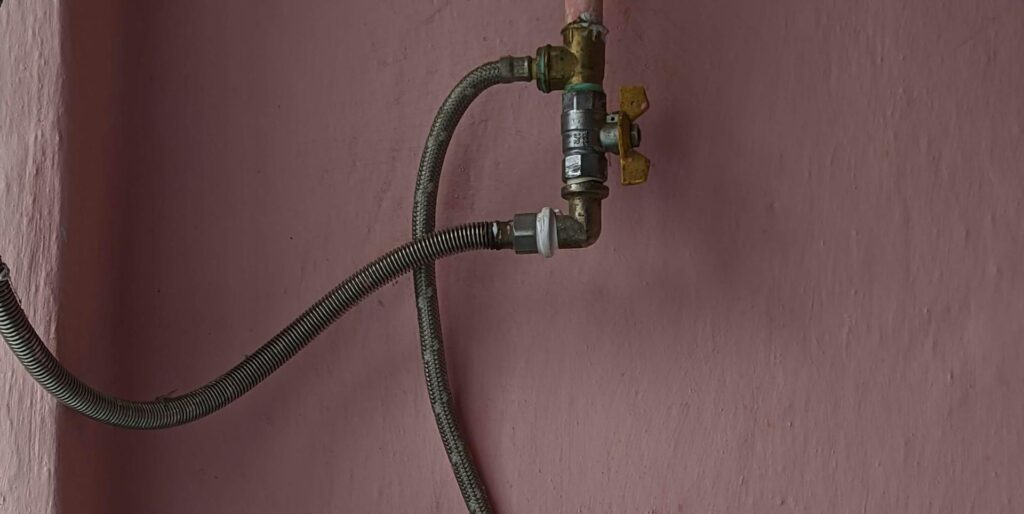
Water heater shut-off valves sit on the cold water supply line that enters the top of the tank, usually a few inches above the unit. This valve looks like a ball valve with a lever handle, and turning it perpendicular to the pipe stops cold water from refilling the tank. A leaking water heater is a serious emergency because tanks hold 40 to 80 gallons of hot water that can flood a garage or utility closet quickly. Closing the cold water supply valve stops the leak from getting worse while you call a plumber for repair or replacement. For gas water heaters, also turn off the gas supply valve on the gas line to prevent any safety issues. For electric water heaters, flip the dedicated breaker in your electrical panel to cut power to the unit.
Washing machine shut-off valves are mounted on the wall behind the washer, often inside a small recessed box with two valves visible. Hot and cold supply lines run from these valves to the back of the washing machine, and a burst washer hose is one of the top causes of indoor flooding nationwide. Closing both valves stops water flow immediately and protects your laundry room floor and walls from extensive damage. Many homeowners keep these valves closed between loads as a preventive measure, which adds a small step but eliminates a major flood risk. Single-lever valves are also available that close both hot and cold lines with one motion, making the daily habit much easier. Replace rubber washing machine hoses with braided stainless steel versions every five years to prevent burst hose disasters.
Refrigerator ice maker lines have a small shut-off valve, usually located behind or beneath the refrigerator or in the basement below the fridge. These quarter-inch plastic or copper lines can develop leaks that drip slowly for weeks before anyone notices warped floors or stained ceilings. Knowing where this valve sits helps you stop a sneaky leak that might otherwise cause expensive cabinet and flooring damage. Dishwashers typically tap into the hot water line under the kitchen sink and can be shut off using the same valve that serves the kitchen faucet. Outdoor hose bibs sometimes have an interior shut-off valve in a basement, crawl space, or utility area, which lets you winterize the line during freezing weather. Walk through your home and identify every appliance valve so nothing surprises you during a real emergency.
Shutting Off The Water Supply Before A Repair
Closing the right shut-off valve before any plumbing repair protects your home from accidental flooding and makes the repair work much safer. Even a simple project like replacing a faucet cartridge requires turning off the water first, or you will end up with a geyser shooting across your bathroom. Always test that the water is actually off by opening the faucet or fixture before you start removing any parts. A valve that looks closed but still passes water is a common cause of soaked DIY repair attempts. Take a photo of the original setup before disassembling anything so you can reference it during reassembly. Lay down towels around the work area to catch any small drips that occur during the project.
For larger repairs like replacing a water heater or fixing a burst pipe, shutting off the main water supply is the safer choice over relying on individual valves. Draining the affected line through the lowest faucet in the house removes residual water that would otherwise spill during the repair. Bleeding pressure from the system also makes pipe connections easier to disassemble without fighting against stuck-on fittings. Wear safety glasses during any plumbing repair because stored pressure can cause water to spray unexpectedly even after the supply is off. Keep your phone nearby in case the project becomes more complicated than expected and you need to call a professional. Most DIY plumbing disasters start because someone skipped the water shut-off step to save a few minutes.
After completing any repair, turn the water back on slowly by opening the shut-off valve just a quarter of the way at first. This gradual reopening lets you check for leaks at the repair site before full water pressure hits the new connection. Listen for hissing sounds and watch for visible drips around any fittings you replaced or tightened. Once everything looks dry, open the valve fully and run water through the fixture for a few minutes to flush any debris. Check the repair site again after thirty minutes and again the next day to catch any slow leaks that develop under pressure. Need a licensed plumber for your repair project? Click here for our leak detection service.
Why You Need A Professional Plumber For Water Supply Emergencies
Shutting off your water is the critical first step in any plumbing emergency, but it is just the beginning of solving the actual problem. A burst pipe, failed water heater, or major leak requires professional diagnosis and repair to prevent the same disaster from happening again. Trying to handle major plumbing repairs yourself often leads to bigger problems, code violations, and insurance complications down the road. Whitestone Plumbing offers 24/7 emergency service throughout Cedar Park, Round Rock, Leander, and the surrounding Central Texas communities. Our licensed technicians arrive quickly, diagnose the issue accurately, and complete repairs to professional standards that protect your home long term.
Why You Need Fast Response For Water Emergencies
Every minute counts during a plumbing emergency because water damage compounds rapidly inside walls, floors, and ceilings. A small leak can saturate drywall, soak insulation, and warp hardwood floors within just a few hours of starting. Mold begins growing on damp surfaces within 24 to 48 hours, creating health hazards and expensive remediation projects. Calling a professional plumber immediately after shutting off your water gives the best chance of limiting damage to a manageable area. Our team understands the urgency of water emergencies and dispatches help as quickly as possible day or night.
Cedar Park homes face unique plumbing challenges because of our hard water, hot summers, and occasional hard freezes during winter. Pipes burst more often during sudden temperature drops, and water heater failures spike during cold snaps when demand peaks. Having a trusted local plumber on speed dial means you waste no time searching for help during a stressful situation. Whitestone Plumbing has served the Cedar Park area for over 20 years, so we know the common problems in local neighborhoods. Our familiarity with area construction styles helps us diagnose issues faster than out-of-town competitors.
Insurance claims for water damage often require professional documentation and repair records to receive full coverage. DIY repairs can void coverage or create disputes with adjusters about the cause and extent of damage. A licensed plumber provides invoices, photos, and professional opinions that support your claim and speed up reimbursement. We work with homeowners every week who need help documenting plumbing failures for their insurance companies. Calling us early in the emergency process protects both your home and your financial recovery from the incident.
Why You Need Expert Diagnosis For Hidden Plumbing Problems
Many plumbing emergencies have underlying causes that are not visible from the obvious leak or failure. A burst pipe might result from high water pressure, corrosion, freezing, or shifting foundation, and each cause requires a different long-term solution. Simply patching the visible problem without addressing the root cause guarantees that another failure is coming. Professional plumbers use diagnostic tools like pressure gauges, camera inspections, and moisture meters to find the real source of trouble. Our experienced technicians have seen every type of plumbing failure that occurs in Central Texas homes.
Older Cedar Park homes often have a mix of pipe materials including copper, galvanized steel, and PVC, each with its own failure patterns and repair requirements. Galvanized pipes rust from the inside out, slowly restricting water flow before finally bursting in a hidden wall. Polybutylene pipes from the 1980s and 1990s fail randomly and often require full repiping to prevent ongoing emergencies. Identifying your home’s pipe materials helps prioritize which areas need attention before the next surprise failure. Whitestone Plumbing offers full inspection services that catch problems before they become emergencies.
Water pressure problems are another hidden cause of repeat plumbing failures throughout the Cedar Park area. Pressure above 80 psi shortens the lifespan of fixtures, appliances, and pipes by causing constant stress on every component. A failed pressure regulator at the main water supply can let city pressure climb to damaging levels without any warning sign. Testing your home’s water pressure during any service call helps prevent future emergencies caused by excessive force. We carry pressure gauges on every truck and check pressure as part of our standard diagnostic process.
Why You Need Whitestone Plumbing For Your Cedar Park Home
Whitestone Plumbing is locally owned and operated right here in Cedar Park, with our office on Dewberry Drive serving the entire Central Texas region. Our 20-plus years of plumbing experience covers everything from simple toilet repairs to complete home repiping projects. We are fully licensed, insured, and backflow certified, meeting every requirement for professional plumbing work in Texas. Every job comes with free estimates and clear, honest pricing before any work begins. Our reputation in the community is built on five-star service that treats every home like our own.
Emergency plumbing situations require immediate response, and our 24/7 availability means help is just a phone call away at any hour. We answer calls personally and dispatch technicians quickly to limit damage and restore your home to normal. Our trucks carry the parts and tools needed to handle most repairs on the first visit without delays. We arrive on time, wear shoe covers, and clean up after every job to respect your home and family. The peace of mind that comes from having a trusted plumber ready to respond is worth more than any small savings on cheaper service.
Cedar Park, Round Rock, Leander, Georgetown, Pflugerville, Austin, Jonestown, Lago Vista, and Hudson Bend homeowners trust Whitestone Plumbing for all their plumbing needs. From minor repairs to major emergencies, we deliver professional results at fair prices throughout Central Texas. Call us today at (512) 826-6217 to schedule service or to handle any emergency that comes up. You can also reach us by email at info@callwhitestone.com for non-urgent questions or estimate requests. Make Whitestone Plumbing your trusted partner for every plumbing challenge your home faces.